Bacon eggs and cheese muffins
Posted: September 4, 2014 Filed under: Eggs, Gluten free, Pork, Snacks | Tags: Bacon, Baking, Cheese, Eggs, Gluten free, Savoury Muffins 1 Comment
The last thing I was expecting was seeing bacon muffins offered as a “healthy option packed with protein”. Specially, when I classified them as totally unhealthy, but worthwhile the risk about 3 years ago. Well, it is gluten free, after all… In any case, an excellent make ahead dish for brunch, lunch or keep the beasts lovely colleagues happy, motivated or blissfully unaware of the sky falling down their heads challenges.
Bacon eggs and cheese muffins (adapted from Our Nourishing Groots)
Ingredients
- 12 eggs
- 350g of bacon, chopped and cooked
- 180g of Gruyere (or other sharp) cheese, shredded
- A pinch of dried basil and oregano
- salt and pepper to taste
- 80g 0f Parmesan cheese
Method
1. Preheat the oven to 175oC
2. Heat a large flat frying pan until is piping hot. Lay out the chopped bacon strips so that they are not overlapping but generally fill the pan. Cook the bacon on its own grease. When they are translucent, remove them from the heat and reserve.
3. In the meanwhile, stir together the 12 eggs whole eggs. Add the cooked bacon and the grated Gruyere cheese. Season with salt and pepper. Add the oregano and shredded basil.
4. Line the muffin tray with paper liners. Ladle the muffin mixture and sprinkle with Parmesan cheese.
5. Bake for 25 minutes, or until puffy and slightly browned on top. Remove from oven and let cool for about 15 minutes on a wire cooling rack. Loosen the paper cups with a butter knife and lift out of the muffin pan.
6.Serve immediately while still warm, or let cool completely and store in an airtight container in the refrigerator.
Chouquettes
Posted: February 5, 2014 Filed under: Pastry and Baking, Snacks, Vegetarian | Tags: Baking, Elizabeth Bard, French, Sugar Leave a comment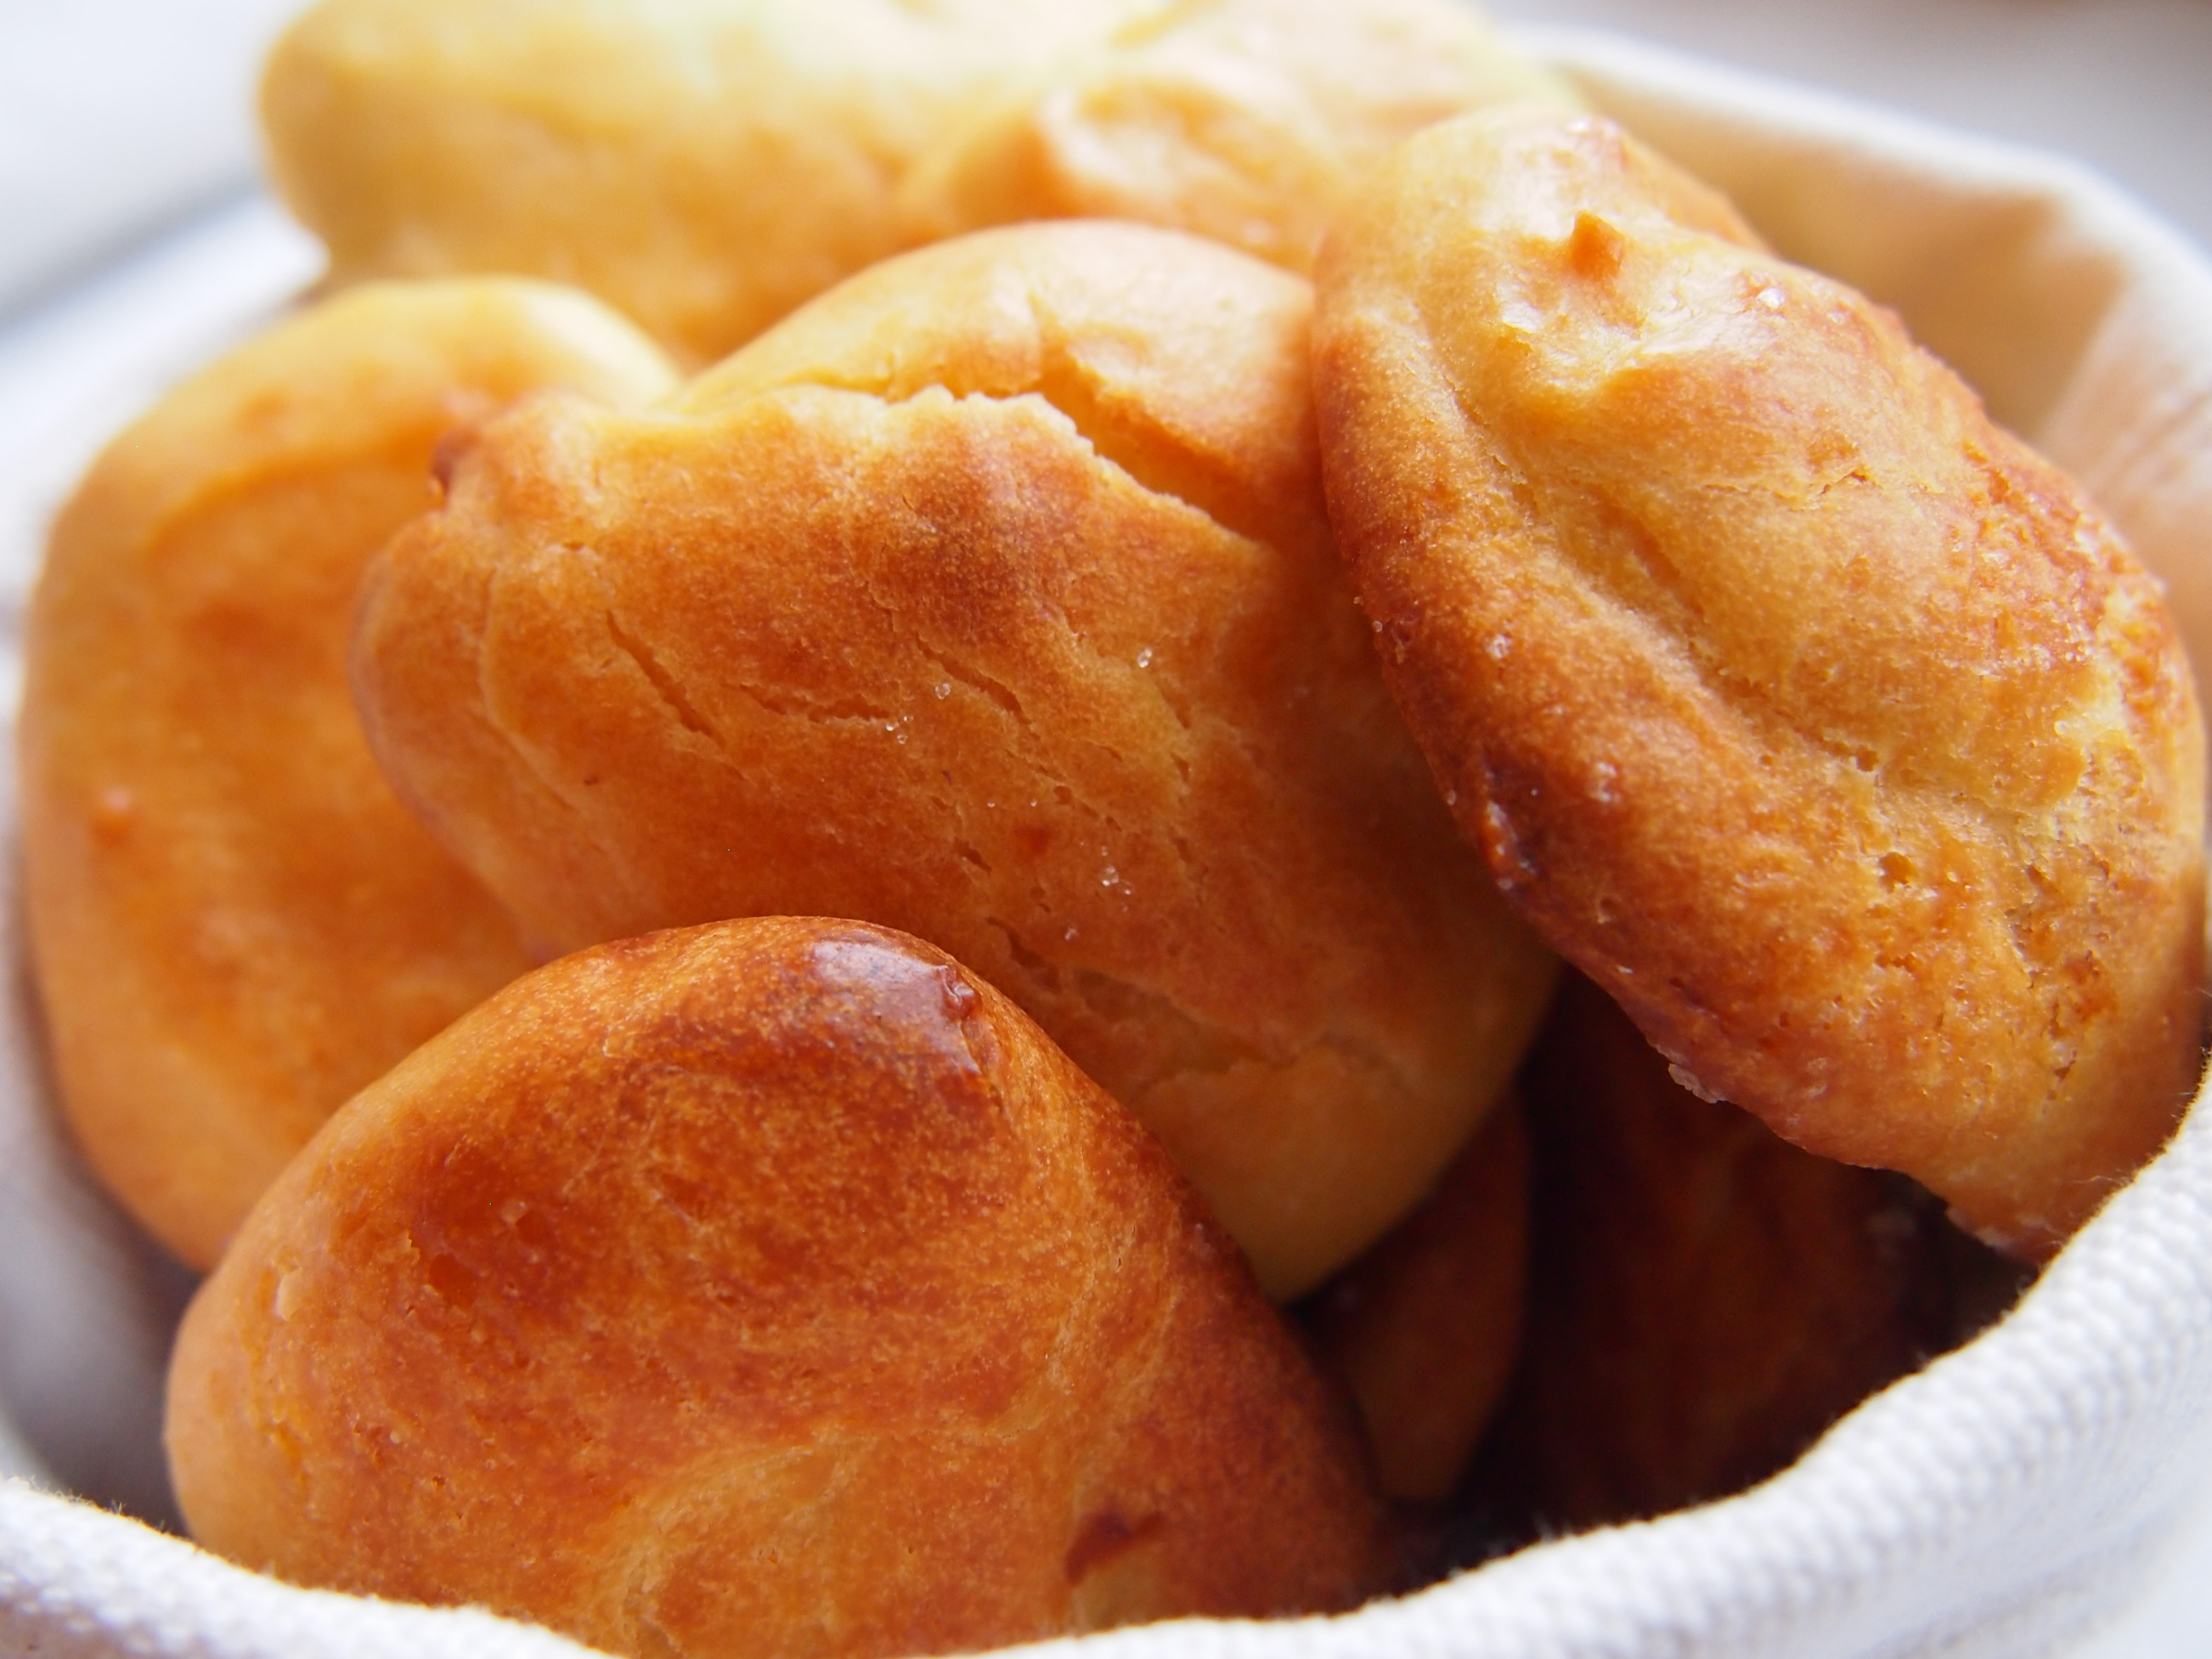
Truth to be told, this is far cry from the true chouquettes you can buy in Paris. The multicolour beads of sugar are missing, to start with, they are too big, they were not as airy as they should have been. But, also truth to be said, while these chouquetes are a travesty of the real ones, they were still delicious. They came out as small slightly sweet breads, ideal to eat with a little butter and ham or cheese. No complaints heard from the mobile calorie intake units, at least…
Chouquetes (adapted from Elizabeth Bard‘s Lunch in Paris: A Love Story with Recipes )
Ingredients
- 120mL all fat milk
- 120mL water
- 120g of butter without salt, cut in cubes
- 2 spoons of sugar
- 3/4 teaspoon of kosher salt
- 120g all purpose flower
- 3 tablespoons of coloured sugar beads (or regular sugar)
Method
Pre heat the stove to 220 oC.
Line two baking trays with parchment paper
In a large saucepan with a heavy bottom, combine the water, butter, sugar and salt on a low temperate. Once the it is well mixed, bring to a gently boil and remove immediately from the heat. Add the flour spoon by spoon dstir vigorously with a wooden spoon until a tight dough forms and pulls away from the side of the pan. It should feel like a tight dough, with a texture similar to marzipan.
Quickly add 2 eggs and mix until well incorporated. Add the remaining two eggs and mix until you have a sticky soft mixture.
Using two teaspoons, make small mounds of dough, leaving enough space between them (you can also use a piping bag with a plain tip). Sprinkle with the granulated sugar or the coloured beads.
Put the trays in the stove one at a time and let cook for about 12min at 220oC. Then lower the heat to 200oC and let the chouquettes bake with a the over door slightly open (using a wooden spoon to hold the door will do).
Beetroot and walnut hummus
Posted: July 11, 2013 Filed under: Snacks, Tapas, Vegetables, Vegetarian | Tags: Beetroot, Hugh Fearnley-Whittingstall, Nut, Spread, Tapas Leave a comment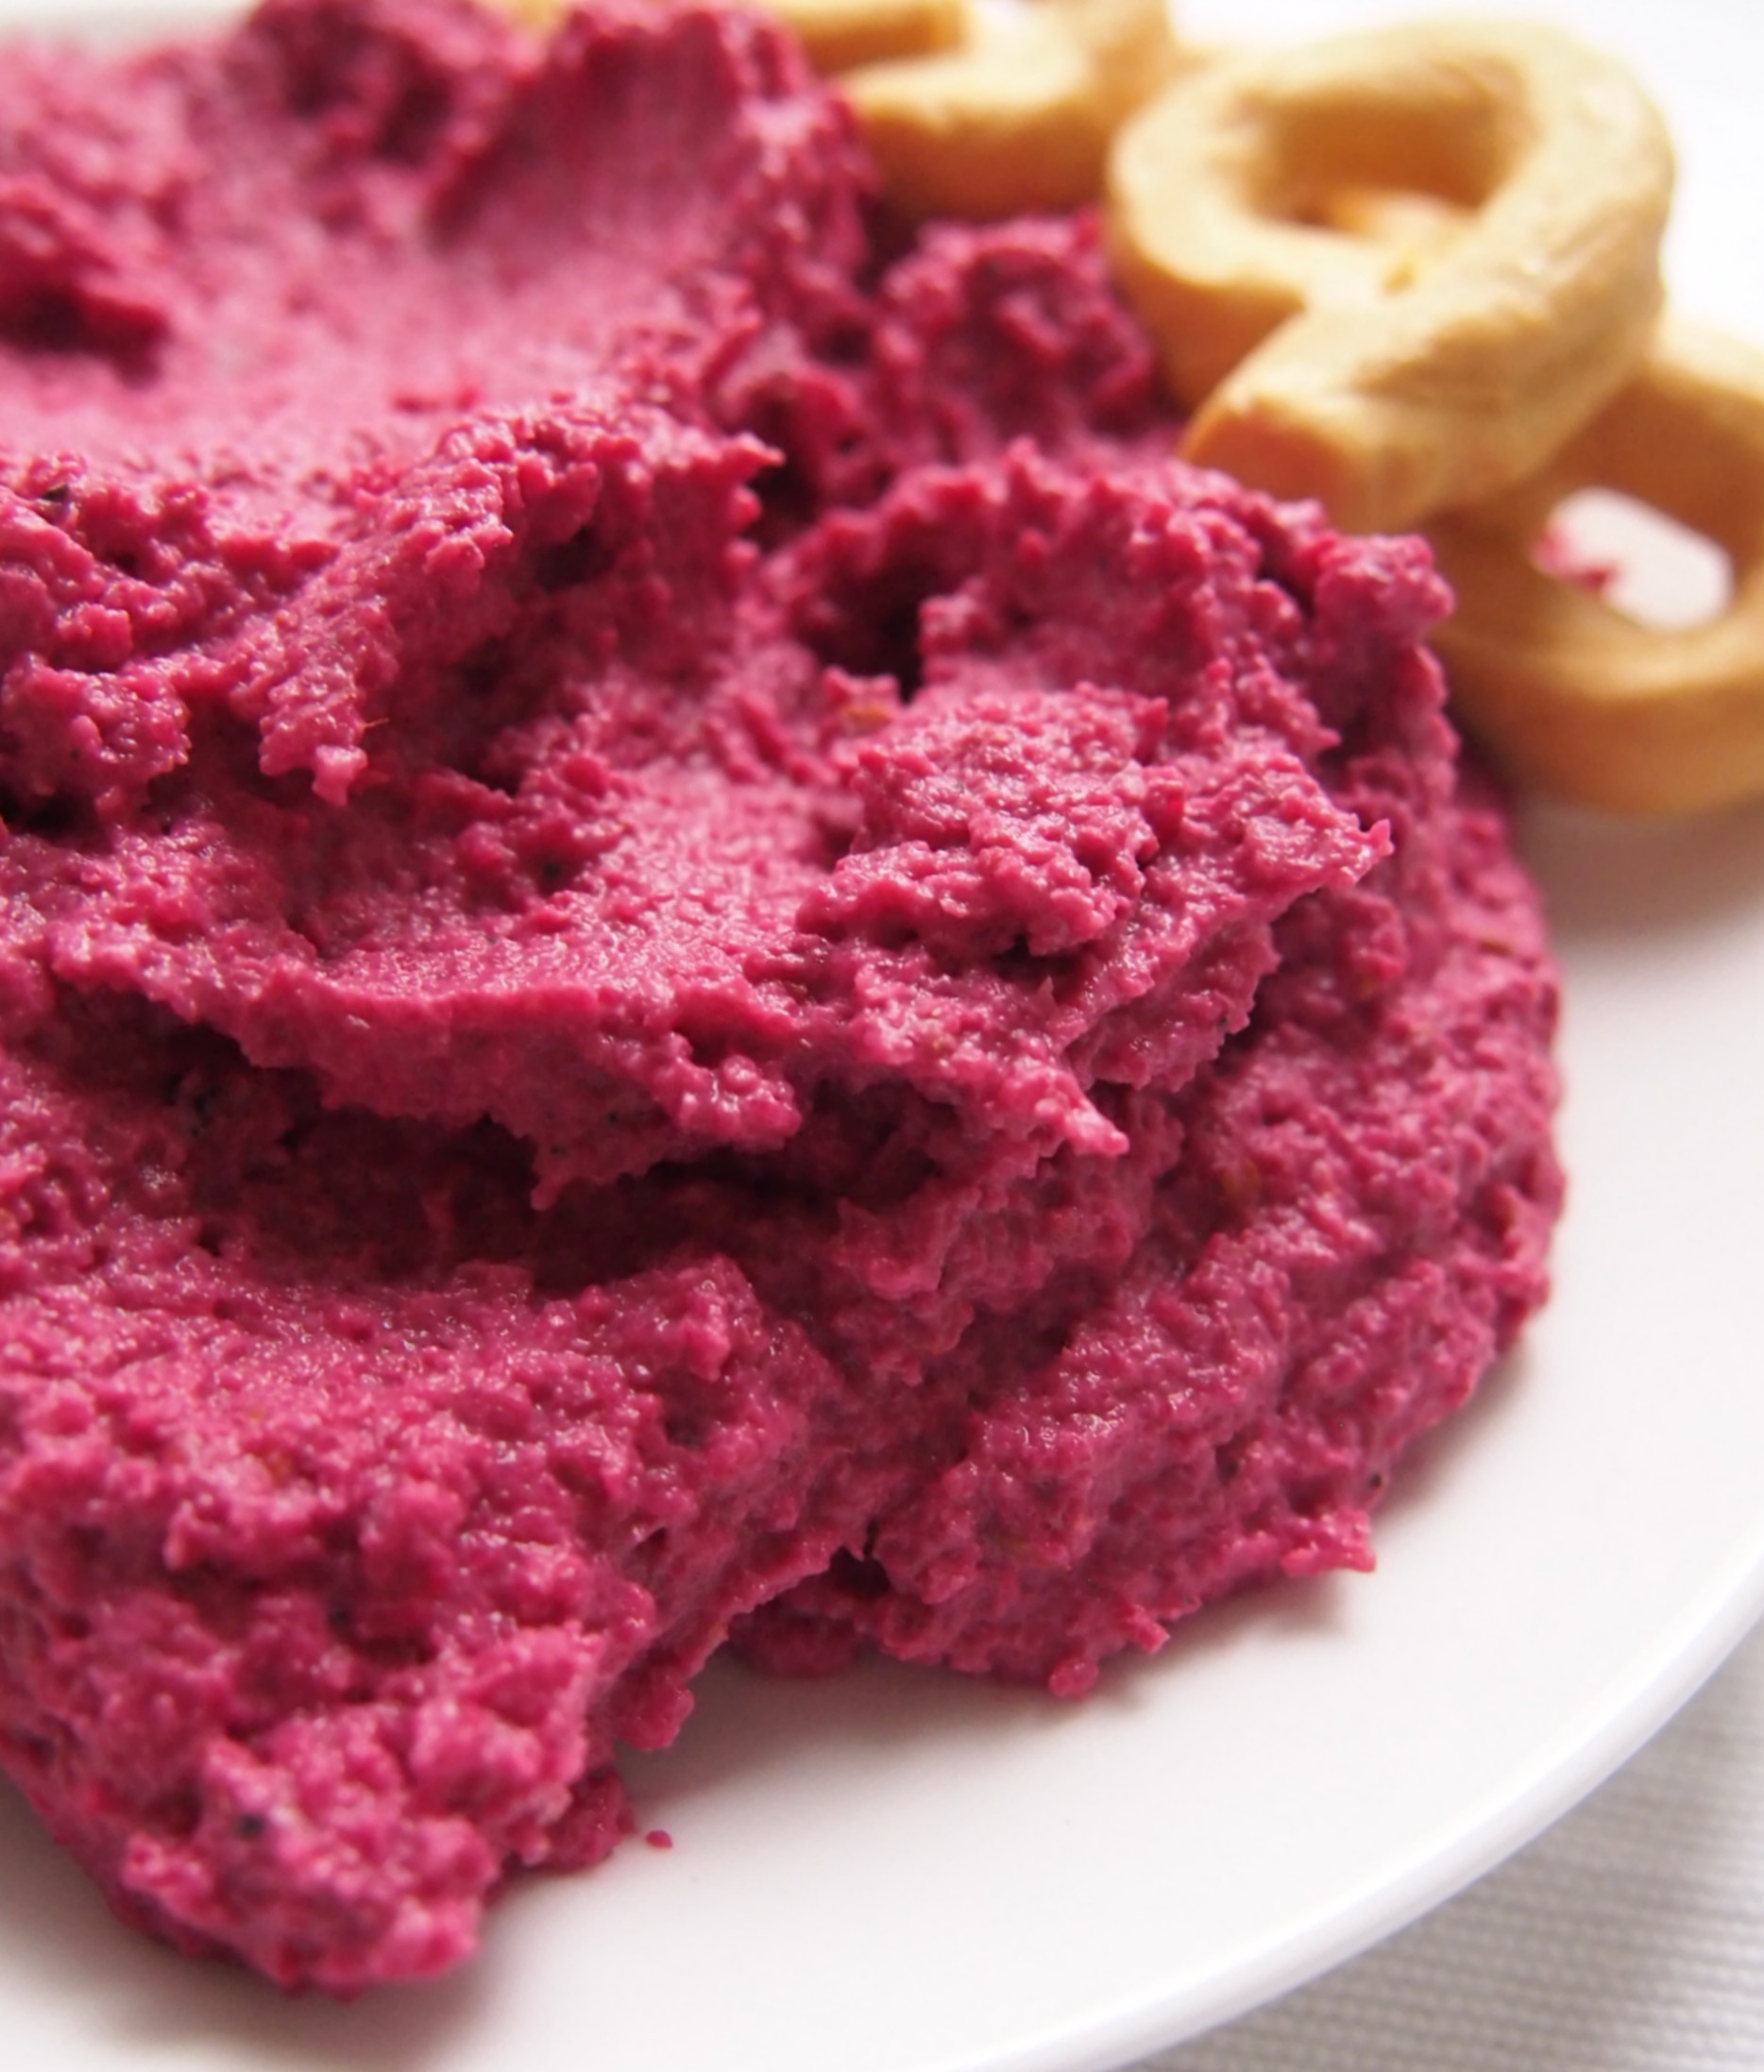
This #beetrootgate episode is long overdue… It has been almost a month I posted a beetroot dish, a spread turned into a creamy soup. Truth to be said, actually never managed to get the right consistency. After trying a couple of times, I ended up doing this beetroot and walnut hummus instead. Well, technically this isn’t exactly a hummus, as there are no chickpeas in this dish, but its colour and flavour compensate for this culinary liberty. It is a brilliant recipe, almost foolproof, with the earthy sweet flavour of the beetroot combining to perfection to the crunchy nuts and slightly tangy tahini. I had to hide it in the fridge before I ate it all, one spoon at a time.
Beetroot and walnut hummus (adapted from Hugh Fearnley-Whittingstall‘s River Cottage Every Day)
Ingredients
- 50g walnuts
- 1 tbsp cumin seeds
- 25g stale bread, crusts removed
- 200g cooked beetroot (not pickled), cut into cubes
- 1 tbsp tahini (sesame seed paste)
- 1 large garlic clove, crushed
- Juice of 1 lemon
- Sea salt and freshly ground black pepper
Method
Toast the walnuts in a stove at 180 oC for 5-7 minutes, until fragrant. Leave to cool.
In a small frying pan over a medium heat. Add the cumin seeds and dry-fry them, shaking the pan almost constantly to avoid burning, until they start to sizzle. Crush the seeds with a pestle and mortar or a spice grinder.
Break the bread into small chunks, put in a food processor or blender with the walnuts and blitz until fine. Add the beetroot, tahini, most of the garlic, a good pinch of the cumin, half the lemon juice, a little salt and a good grind of pepper, then blend to a thick paste.
Adjust it by adding a little more cumin, garlic, lemon, salt and/or pepper, blending again until you are happy with it. Loosen with a dash of oil if you think it needs it.
Serve at room temperature
PS – Cookies (Taralli Caserecci Pugliesi) courtesy of Coop Fine Food
Savoury cookies with parlsey and tahini spread
Posted: June 30, 2013 Filed under: Pastry and Baking, Snacks, Tapas, Vegetarian | Tags: Cookies, Herbs, Snacks, Spread, Tahini, Tapas, Yotam Ottolenghi Leave a comment
B. was wondering what to do with a bottle of tahini he had sitting on his fridge. “What is this used for?”, he asked. “Oh, well, plenty of stuff like humus… and errrr… humus…. or even maybe carrot hummus, if you will“, I answered a bit mortified by the lack of options. Seriously, is tahini used just for hummus? After googling for a few minutes, it seems it also very popular in vegan cuisine, including lebanese inspired brownies (add beetroot for extra touch of healthiness), it is fundamental for baba ghanoush and the hero in all sorts of yoghurty-garlicky-herb-y dips. Like for example, this one I found in Jerusalem (but of course…). As a bonus, these savoury biscuits, a favourite of Yotam’s father. Totally addictive…
Savoury cookies with parsley and tahini spread (adapted from Yotam Ottolenghi and Sami Tamimi‘s Jerusalem)
Ingredients
Cookies
- 500g of plain flour sifted
- 100mL of sunflower oil
- 100 unsalted butter diced and left to soften
- 1 teaspoon of fast action dried yeast
- 1 teaspoon of baking powder
- 1 teaspoon sugar
- 1 1/2 teaspoon salt
- 1 1/2 teaspoon ground cumin
- 1 1/2 teaspoon fennel seeds toasted and very lightly crushed
- App 100mL of water
- 1 medium egg, whisked
- 2 teaspoon white (and black) sesame seeds
Dipping sauce
- 35g flat leaf parsley (stems and leaves)
- 1 garlic clove crushed
- 25g light tahini paste
- 125g Greek yoghurt (drained)
- 25mL lemon juice
- Pinch of salt
Method
Cookies
Preheat the oven to 200 oC. Place the sifted flour in a large bowl and make a well in the centre. Pour the oil into the well, add the butter, yeast, baking power, sugar, salt and the spices and stir together until the dough is formed. Add the water gradually while stirring until the dough is smooth. Knead for a couple of minutes.
Line a baking sheet with baking parchment. Divide the dough into small bowls, about 25g each. On a clean surface, roll the balls into long snakes, around 1cm thick and 12-15cm long. Make a closed out of each snake dough, and put on the parchment paper leaving a 2 cm distance between each of them. Brush each ring with the egg wash and sprinkle lightly with sesame seeds. Leave to prove for 30min.
Bake the biscuits in the oven for 22min, until golden brown. Allow to cool before storing. They will keep for 10days.
Dipping sauce
Blitz all the ingredients together to get a smooth, uniform green sauce you can use to coat the cookies. Add a bit more water if necessary.
Roasted carrot hummus with orange
Posted: May 25, 2013 Filed under: Snacks, Tapas, Vegetables, Vegetarian | Tags: carrot, Hugh Fearnley-Whittingstall, Hummus, Orange, Spread, Vegetarian Leave a comment
I know I am partial to all things carroty… I had to try this one, mobile calorie intake units or no mobile calorie intake units to entertain. While it might be a departure from the original carrot hummus recipe (no chickpeas in sight), it was certainly delicious. The kind of food I need to hide from myself to make sure I don’t eat it all in one go. Sweet and spicy, aromatic and smooth, shiny and happy…
PS – Lingue di suocera [mother in law’s tongue] courtesy of Coop Fine Food
Roasted carrot hummus with orange (adapted from Hugh Fearnley-Whittingstall’s column in The Guardian)
Ingredients
- 500g carrots, peeled and cut into 4-5cm chunks
- 4 large garlic cloves, bashed
- 2 tbsp olive oil or rapeseed oil
- 1 small orange, juiced, zest finely grated
- Juice of ½ lemon
- 3 tbsp tahini (sesame seed paste)
- Sea salt and freshly ground black pepper
Method
Heat the oven to 200 oC
Put the carrots, garlic and oil in a roasting tin, season and roast for 30-35 minutes, giving the carrots a good stir halfway through, until tender and starting to caramelise at the edges. Remove from the oven and leave to cool slightly.
Tip the carrots into a food processor. Squeeze the garlic cloves out of their skins and put these in, too, along with any oil from the tin. Add the orange zest and juice, lemon juice, tahini and some salt and pepper, and process to a coarse purée. Add more lemon juice and seasoning as necessary. Serve the hummus warm or at room temperature.
Idiazábal cheese and caramelised onion tapa
Posted: March 30, 2012 Filed under: Snacks, Tapas, Vegetables | Tags: Cheese, Onions, Simone & Ines Ortega, Spain, Tapas Leave a comment
Nowadays, you can get decent (and indecent, for that matter) Manchego cheese in almost every supermarket. But, Idiazábal cheese is only to be found in high end delicatessen shops, at the price of an arm, a leg, and your children corneas. I only remember having it once in the 9 years I have been living in Switzerland, and truth to be said, it was a Spanish acquaintance who smuggled it in gruyère -land.
In case you are wondering, Idiazábal is a Denominación de Origen [Protected designation of origin] hard sheep cheese from the Basque and Navarre regions, which has a rich smoky flavor. Apparently, the Basque shepherds used to store the cheese in their huts over Winter. The smoke coming out of their fireplaces eventually permeated their dairies, giving it a new flavor that the shepherds preferred. All I can say is that the flavor (and aroma) is strong. Very strong…
In fact, so strong I thought my suffering testers dinner guests wouldn’t appreciate it to its full splendor. I resorted to Simone and Inés Ortega’s The Book of Tapas for help, and as it turned out, it was actually a very good idea to serve this tapa rather than the pure thing. The sweetness of the onion and honey complement to perfection the slightly less smokey and hot-ish flavor the cheese, for complete delight of guests and cook.
Idiazábal cheese and caramelised onion tapa (adapted from Simone and Inés Ortega’s The Book of Tapas)
Ingredients
- 200g Idiazábal cheese, rind removed and sliced
- 1 cup (=250mL) milk
- 2 teaspoons black peppercorns, slightly crushed
- 1 cup olive oil
- 1 onion, finely sliced
- 6 slices of French baguette
- 1 teaspoon honey
Method
1. Put the cheese in a bowl, add the milk and the crushed peppercorns. Let it sit for about 30min (until it is a bit softer)
2.In the meanwhile, heat the olive oil in a non-adherent frying pan until it shimmers. Drop in the onion, and let it caramelise, stirring every now and gain.It should take about 15min.
3. Fish the cheese out of the bowl and pat dry with kitchen paper.
4.Place each slice of cheese on top of the bread and drop about 1 teaspoon of the caramelised onions over it. Finish the tapa by drizzling a little honey over it.
Pumpkin bread
Posted: October 19, 2011 Filed under: Dessert, Snacks, Vegetarian | Tags: Cake, Chestnuts, Pumpkin Leave a comment
Normally, I only publish dishes I have made with my own hands. But, this pumpkin bread baked by the lovely K. made me change my mind. I picked a slice, and just couldn’t stop eating it. I had to go for a second slice. And a glass of milk. Then, everything make sense again…
Pumpkin bread
Ingredients
- 3/4 (=100g) white flour
- 3/4 (=100g) wholewheat flour
- ½ teaspoon of salt
- 1 cup sugar
- 1 teaspoon baking soda
- 1 cup pumpkin purée (see recipe below)
- ½ cup (=115mL ) olive oil
- 2 eggs, beaten
- ¼ cup water (=60mL)
- ½ teaspoon nutmeg
- ½ teaspoon cinnamon
- ½ teaspoon allspice
- ½ cup chopped walnuts or pecans
Method
Preheat oven to 350°F (=180°C) and generously coat the inside of a loaf pan with your preferred cooking spray. Use a non-stick pan, if you have one.
Sift together the flour, salt, sugar, and baking soda. Set aside your dry ingredients.
Mix the pumpkin, oil, eggs, water, and spices thoroughly. Combine your wet ingredients with the dry ingredients, mixing lightly. Fold in the nuts and pour the batter into your prepared pan.
Bake the bread for 50-60 minutes until a toothpick or knife inserted in the center of the loaf comes out clean. If the loaf is browning too quickly on top, you can cover it with foil for the last ten to fifteen minutes of baking.
Turn your pumpkin bread out of the pan and let it cool on a wire rack. Quick breads taste great warm but will crumble badly when you cut them before they have cooled completely. The bread will taste best after sitting for several hours or overnight, to allow the flavors to marry
Pumpkin purée
To make pumpkin purée, cut a small pumpkin in half and scoop out the seeds and strings. Lay the halves facedown on a foil- or parchment-lined baking sheet. Bake them at 350°F until soft, about 45 min to an hour.
You can also cut your pumpkin into pieces and roast or boil them until tender. This makes removing the skin much easier. Cool the squash, scoop out the flesh, and mash it with a fork. Freeze whatever squash you don’t use
Breakfast oat bars
Posted: October 11, 2011 Filed under: Cereal, Snacks, Vegetarian | Tags: Breakfast, Brunch, Cereal bars, Cereals, Coconut, Condensed milk, Cranberry, oats, Peanuts, Snacks, Sugar Leave a comment
It came to my attention that yesterday, October 1oth, was World Porridge Day. While it is unlikely I’ll post a porridge dish any time soon, I indeed had on archive something that called for oats. It is a super easy recipe of home-made breakfast by Nigella I first saw on Canela moída. I tend to avoid this sort of snacks, no matter how many claims of “healthy food” they have. Most of the times they are too sugary, too chewy, too fatty, too synthetic, too caloric…. But, this home-made one is almost a guilt-less treat, packed with different flavors and textures. A healthy sugar-rush, if you will.
As usual, a few tweaks. Cranberries are difficult to source in this part of world, so I used muesli oats with added fruit. But, this is the type of dish you can do with your favorite ingredients, as long as you keep the proportion of solids and condensed milk the same. It is very quick to do, but it takes about one solid hour to bake and another one to get it cool.
Be warned: once you start doing this, there is no back to the vending machine to get a plastic one.
Breakfast oat bars
Ingredients
- 1 x 397g can condensed milk (=1 tube of condensed milk)
- 350g oats (not instant) with 50% added fruit, including a lot of cranberries (original recipe called for 250g rolled oat and 100g dried cranberries.
- 75g shredded coconut
- 125g mixed seeds (pumpkin, sunflower, sesame)
- 125g natural unsalted peanuts
Method
Preheat the oven to 130°C/gas mark 1/2, and oil a 23 x 33 x 4cm baking tin, or use a throwaway foil one.
Warm the condensed milk in a large pan.
Meanwhile, mix together all the other ingredients and then add the warmed condensed milk, using a rubber or wooden spatula to fold and distribute.
Spread the mixture into the tin and press down with the spatula or, better still, your hands to even the surface. Just make sure you are wearing disposable vinyl gloves to do this, otherwise you will end up with the sticky oats all over your fingers.
Bake for 1 hour, then remove from the oven and, after about 15 minutes, cut into four across, and four down to make 16 chunky bars. Let cool completely
Anchovy, hard boiled egg and caper on toast (pintxo de anchoas)
Posted: September 28, 2011 Filed under: Eggs, Fish, Snacks | Tags: Anchovies, bread, Spain Leave a comment
In a literal manner, tapa means a cover or lid in Spanish. But, if you are talking about food, a tapa refers to a range of fine appetizers and nibbles that are served in bars and pubs to accompany a glass of wine or beer. Over the years, tapas have evolved into a completely new concept, being now a synonym of miniature dishes – sometimes very sophisticated – which are put together to form a meal. In any case, tapas, or its closely related pintxos and raciones, are the center of informal meals and allow you to focus on chatting and socializing rather than scoffing a full blown dinner.
Even risking sounding a bit pedantic, the dish I am doing today is a pintxo. Traditionally, this combination with anchovies is ubiquitous in the Basque Country. And, you simply are not not served tapas in the Basque Country. Up the there, the pieces of bread with something on top are called pintxos. Incidentally, unlike other parts of the country, you also have to pay for them. In case you wonder, about.com does a excellent job on explaining with great detail and accuracy what is one or the other, and the difference between them.
As of late, I have been kind of missing this sort of flavors from home… A poker night presented itself like the perfect opportunity to give it a go. After googling a bit, I ended up finding this Spanish blogger from Bilbao, whom had a recipe that looked very much like the pintxos de anchoa you can find all over the Basque Country.
Anchovy, hard boiled egg and caper on toast (pintxo de anchoas)
Ingredients
- 150 grs. of cream cheese, like Philadelphia
- 2 tins of salted anchovies
- Sliced bread (I use the equivalent of a French bagette, cut diagonally).
- 2 hard boiled eggs, chopped very finely.
- Capers or sliced gurken
- Olive oil
Method
Put the cheesed and the anchovies (plus its olive oil). Mix well with a blender until you obtain a homogenous mix. Reserve.
Cut the bread crust out, and cut each slice in half so you can obtain 2 rectangles. Fry in a generous quantity of olive oil. Be careful to not let the olive oil overheat to avoid the bread to burn. I was on a hurry this day, and simply toasted the bread until it was crunchy. This version is also less caloric.
Spread a generous quantity of anchovy mix so you obtain a thick layer on top of the bread. Cover with the egg and put a couple of cappers on top of it.
Banana and chocolate bread
Posted: September 16, 2011 Filed under: Chocolate, Dessert, Snacks | Tags: Banana, Cake, Chocolate, Sugar 1 Comment
What do to feed the 11-year-old for breakfast? Well, easy answer: banana and chocolate bread. He even agreed to by my sous-chef, raised for the occasion and thanked profusely. The original recipe is by Bill Granger, found during a totally random google search.
Banana and chocolate bread
Ingredients
- 250g of all-purpose flour
- 2 teaspoons baking powder
- 125g unsalted butter, softened
- 250g caster (superfine) sugar (I used regular sugar)
- 4 ripe bananas, mashed
- 2 eggs, lightly beaten
- Seeds of 1 vanilla pod
- 175g good-quality dark or milk chocolate chips
Method
Preheat the oven to 180°C. Sift the flour and baking powder into a large bowl.
Mix the butter, sugar, banana, eggs, vanilla seeds and chocolate chips in a separate bowl.
Add to the dry ingredients and stir to combine, being careful not to over mix.
Pour the batter into a non-stick, or lightly greased and floured, 19 x 11 cm loaf tin and bake for 1 hour 15 minutes, or until the bread is cooked when tested with a wooden skewer.
Leave to cool in the tin for 5 minutes before turning out onto a wire rack to cool.
