Fragrant orange slices
Posted: January 11, 2012 Filed under: Dessert, Fruit, Vegetarian | Tags: Gordon Ramsay, Honey, Orange, Pistachios Leave a comment
At some point over Christmas, I just felt the need to have something sweet but at the same time fresh and light. Meaning, a dessert that didn’t involve deep fried dough or extra sugary milk and eggs concoctions, all covered with even more sugar and a generous amount of cinnamon. While it was not sugar or cinnamon free, these fragrant orange slice were very nice break from all those Christmas excesses. And, for extra bonus, they provided the recommended daily dose of Vitamin C. Overall, it is super easy dish to do, and is ideal to finish a decadent rich meal. Original recipe was found in Gordon Ramsay’s Fast Food.
Fragrant orange slices
Ingredients
- 4 large oranges
- 1 1/2 tablespoon runny honey
- 1 tablespoon orange blossom water
- pinch of ground cinnamon
- 50g toasted walmuts for pistachios, roughly chopped.
Method
Slice off the top and bottom of each orange and place upright on a chopping board. Following the curve of the fruit, cut off the skin, making sure that you remove the withe pith as well. Turn the peeled orange on one side and cut into slices, removing any pips as you do so.
Arrange the orange slices overlapping on individual plates. Mix the honey with the orange blossom water until evenly blended, then drizzle over the orange slices. Mix the cinnamon and chopped walnuts together and scatter over the oranges to serve.
Vanilla buttercream frosting cake
Posted: December 20, 2011 Filed under: Dessert, Vegetarian | Tags: Cake, Dessert, Sugar, Vanilla 1 Comment
You have read it correctly – there are no typos in this sentence nor it is poorly constructed. While the vast majority of cakes have frosting on top or in the middle, the batter of this sponge cake was indeed made using a vanilla buttercream frosting. If there is an Annals of Improbable Culinary Research in this world, this dish would be worthwhile a cover. Or, at least a featured article. In fact, the vanilla buttercream frosting cake is so unlikely to be reproduced, that I will not even try to write down the recipe. If anything, because I cannot remember what ingredient was used when, or the proportions.
Even wannabe-food-bloggers have a less-inspired days in the kitchen. Sometimes, things just don’t go the way you expect – and as we say in Portugal, o que torto nasce, tarde ou nunca se endireita [what is born crooked, late or never gets straightened]. It looked like an semi-easy cake when I read the recipe. But a few hours latter, with the cake still half done and a totaled kitchen, it seemed that I had made a colossal strategic mistake.
Everything went sort of OK, until I tried to whisk the egg whites to soft glossy peaks. I must have done this thousands of times and at this point in my life, I don’t even consider the possibility of failure. But, not today. The white egg mix split, and there was nothing I could do about it. They were split and they remained split, no matter what grandmother tricks I used. I had no other solution but start all over again.
When I thought the worst was over and the cake was placidly sitting on the stove, I started on the frosting, using a Nigella recipe. Instead of a consistent white cream I was supposed to get, I ended up with a grey-greenish liquidy crème with lots of white floaters. I tried to sieve it, as recommended by most Mothers and professional chefs. After this delicate operation, the floaters were gone, but the grey-greenish liquidy could not be used to finish any serious cake. Again, had to start again, this time using the recipe of the original recipe. It called for a lot of butter and even more sugar, but .. it worked. I have to bitterly add, that Nigella’s recipe failed me not once, but twice.
At this point, I had my kitchen bench full of discarded elements: the gray-greenish liquid (basically, butter, sugar, vanilla and some flour), 3 yolks and something that resembled beaten white eggs. Meaning, the elements you need for a cake. Following tje directions of a very basic recipe of sponge cake, I added the egg yolks one by one to the butter and sugar “cream”. Then I tossed in enough flour – and 1 teaspoon of baking powder – to obtain a batter with a nice consistency. Finally, I folded in the egg whites. No need for a lot of TLC- it was actually quite the opposite of this.
Finally, I dropped into the stove, previously heated to 175oC (pretty much a standard of baking), and waited until a wooden stick came out dry from the center of the cake.
The result was a surprisingly light sponge cake, with a fresh almondy – vanilla taste. None of the testers was aware of the precarious conditions of this experiment, and fortunately they are all still alive. Some of them even asked for seconds (and got them).
Mandarin orange coconut cake
Posted: December 15, 2011 Filed under: Dessert, Pastry and Baking | Tags: Baking, Cake, Coconut, Food blogger recipe, Mandarin orange, Sugar Leave a comment
For obscure reasons I was not able to find out, in Switzerland tradition include giving bags of mandarin oranges, peanuts and a few chocolates. The kind of thing you might get at office or from a distant relative…. I was looking for a Christmassy dish, when I saw this on Cinco Quartos de Laranja who had seen it on All Recipes and then tweaked it a bit. By a happy coincidence, I actually had way too many mandarin oranges on the fruit bowl, a tiny bit of coconut in my cupboard and just enough time to bake it. And, voila!, a Christmassy and at the same time fresh and casual dish. Actually, it is also delicious and light, with different flavors and textures in each bite. An excellent way of fooling kiddies into eating their daily dose of citrus.
Mandarin orange coconut cake
Ingredients
- 200g flour and 1 spoon of baking powder, sifted
- 175g sugar
- 170g unsalted butter
- 150mL of mandarin orange juice
- The zest of 3-4 mandarin oranges
- 30g dry powdered coconut
Method
Preheat the oven to 180C. Coat a baking tray with baking spray (or butter and flour)
in a large bowl, beat the butter and the sugar until light and pale yellow.
Add the egg one at a time, beating for 1 minute after each addition.
Fold in the flour and mix well. Once it is well mixed, add the coconut, the mandarin orange juice and zest. Mix until the mixture is uniform.
Put the cake tin in the preheated oven. Bake the cake until golden brown and a toothpick inserted in the middle comes out clean (about 30min)
Pumpkin bread
Posted: October 19, 2011 Filed under: Dessert, Snacks, Vegetarian | Tags: Cake, Chestnuts, Pumpkin Leave a comment
Normally, I only publish dishes I have made with my own hands. But, this pumpkin bread baked by the lovely K. made me change my mind. I picked a slice, and just couldn’t stop eating it. I had to go for a second slice. And a glass of milk. Then, everything make sense again…
Pumpkin bread
Ingredients
- 3/4 (=100g) white flour
- 3/4 (=100g) wholewheat flour
- ½ teaspoon of salt
- 1 cup sugar
- 1 teaspoon baking soda
- 1 cup pumpkin purée (see recipe below)
- ½ cup (=115mL ) olive oil
- 2 eggs, beaten
- ¼ cup water (=60mL)
- ½ teaspoon nutmeg
- ½ teaspoon cinnamon
- ½ teaspoon allspice
- ½ cup chopped walnuts or pecans
Method
Preheat oven to 350°F (=180°C) and generously coat the inside of a loaf pan with your preferred cooking spray. Use a non-stick pan, if you have one.
Sift together the flour, salt, sugar, and baking soda. Set aside your dry ingredients.
Mix the pumpkin, oil, eggs, water, and spices thoroughly. Combine your wet ingredients with the dry ingredients, mixing lightly. Fold in the nuts and pour the batter into your prepared pan.
Bake the bread for 50-60 minutes until a toothpick or knife inserted in the center of the loaf comes out clean. If the loaf is browning too quickly on top, you can cover it with foil for the last ten to fifteen minutes of baking.
Turn your pumpkin bread out of the pan and let it cool on a wire rack. Quick breads taste great warm but will crumble badly when you cut them before they have cooled completely. The bread will taste best after sitting for several hours or overnight, to allow the flavors to marry
Pumpkin purée
To make pumpkin purée, cut a small pumpkin in half and scoop out the seeds and strings. Lay the halves facedown on a foil- or parchment-lined baking sheet. Bake them at 350°F until soft, about 45 min to an hour.
You can also cut your pumpkin into pieces and roast or boil them until tender. This makes removing the skin much easier. Cool the squash, scoop out the flesh, and mash it with a fork. Freeze whatever squash you don’t use
Banana and chocolate bread
Posted: September 16, 2011 Filed under: Chocolate, Dessert, Snacks | Tags: Banana, Cake, Chocolate, Sugar 1 Comment
What do to feed the 11-year-old for breakfast? Well, easy answer: banana and chocolate bread. He even agreed to by my sous-chef, raised for the occasion and thanked profusely. The original recipe is by Bill Granger, found during a totally random google search.
Banana and chocolate bread
Ingredients
- 250g of all-purpose flour
- 2 teaspoons baking powder
- 125g unsalted butter, softened
- 250g caster (superfine) sugar (I used regular sugar)
- 4 ripe bananas, mashed
- 2 eggs, lightly beaten
- Seeds of 1 vanilla pod
- 175g good-quality dark or milk chocolate chips
Method
Preheat the oven to 180°C. Sift the flour and baking powder into a large bowl.
Mix the butter, sugar, banana, eggs, vanilla seeds and chocolate chips in a separate bowl.
Add to the dry ingredients and stir to combine, being careful not to over mix.
Pour the batter into a non-stick, or lightly greased and floured, 19 x 11 cm loaf tin and bake for 1 hour 15 minutes, or until the bread is cooked when tested with a wooden skewer.
Leave to cool in the tin for 5 minutes before turning out onto a wire rack to cool.
Baked peaches with thyme and ice cream
Posted: September 2, 2011 Filed under: Dessert | Tags: Herbs, Ice cream, Peaches, Sugar, Summer Leave a comment
Peaches are long gone, but this dessert will be staying. I saw it on Scarlet Pippin, but the original recipe seems to be by Gordon Ramsay. And, then, I tweaked it a bit more… hopefully, it will become a viral dish because it an ideal dessert for a Summer dinner.
Baked peaches
Ingredients
- 4 whole white peaches.
- 50g icing sugar, 50g caster sugar (I just used 100 of sugarcane sugar)
- 1 vanilla pod
- 25 unsalted butter, melted
- 1-2 teaspoons Cointreau or Grand Mariner (I used prune Schnapps)
- 1 teaspoon of fresh thyme leaves (stripped from stalk)
Method
Mix the icing and caster sugar together and roll fruits in them to coat. Sit peaches in a shallow ovenproof dish. Mix the vanilla seeds with the melted butter and trickle over the peaches.
Bake the peaches uncovered at 190 oC for 5 mins. Remove and spoon the caramelised liquid that has formed in the dish back over the peaches. Return to the oven to bake for 10 mins (spooning over the juices a few more times).
About 5 mins before the peaches are ready, spoon over the liqueur and sprinkle over the thyme. Remove when ready and allow to cool until warm.
Thyme ice-cream
Ingredients
- 250ml of creamy milk
- 250ml double cream
- 3 sprigs of fresh thyme (OR two strands of saffron OR two sticks of cinnamon)
- 6 free range egg yolks
- 90g caster sugar
Methods
Heat the milk and cream in a large saucepan until the liquid starts to creep up the sides of the pan (i.e. boil). Then stir in the thyme sprigs, remove from the heat and leave to cool.
Put the yolks and the sugar in a large bowl and whisk until thick and creamy (ideally with an electric whisk).
Reheat the milk and cream mixture and, when the mixture rises up again, pour into the yolk mixture whilst slowly mixing. Whist until well blended. Strain back into the pan through a sieve (discard the thyme). On the lowest possible heat, stir until the mixture coats the back of a wooden spoon. Cool the custard, stirring occasionally to stop a skin forming. Churn in an electric ice-cream maker if you have such things, or otherwise take out of the freezer to stir regularly as it starts to freeze.
Red velvet cake
Posted: August 12, 2011 Filed under: Chocolate, Dessert, Pastry and Baking | Tags: Cake, Chocolate, Nigella, Sugar, Vanilla 1 Comment
By a strange coincidence I started this blog a few days before my birthday. Actually, one of my first posts was about the ice cream cake my Mother used to do every year around my birthday . This year, however, for some reason, I was not really in the mood for a creamy cold cake… I kept seeing red velvet cakes appearing on different TV shows and food magazines, much to the joy and delight of those who ate them. The New York Times described it as “a cake that can stop traffic”. If even the NY Times said it and Nigella had the recipe on her book and website, why not give it a go and try it for the dinner party?
As its own name says, the red velvet cake is red. Red in an unnatural shade of red. In case doubts that it should be red persist, it is layered with white frosting, to make the red go even redder. It is supposed to have a slight taste of cocoa and vanilla, and a velvety texture given by buttermilk. The red color is allegedly the result of the presence of anthocyanin in the cocoa, which becomes red in the presence of an acid, explaining the necessity of adding unusual ingredients in a cake like vinegar and buttermilk. Strictly speaking, the cocoa might turn to a reddish shade and become dark-red-brown…. To get the extra bright red, abundant food dye has to be added. No one knows for sure where the recipe comes from, whether it was created on the South of the United States or it was an experiment gone mad in a Canadian department store. For sure, it seems to be a New World creation, as it is hardly ever seen on European cookbooks. In fact, I cannot remember ever seeing it for sale on this side of the Atlantic patisseries.
As this was a birthday cake, an elaborate decoration was expected. I had planned to do a flamenco style polka-dot pattern, being the number of red dots being equal to my age (approximately and vaguely equal- to avoid sticking candles on the cake, any excuse was worth trying). But… the butter cream was a bit more runny than it should have been, and though I had a perfect cylinder of marzipan to start with, cutting it in thin slices didn’t do any favors to its shape. It ended up as a Dali interpretation of a rustic Seville-olé red velvet cake (picture here). Per se, the name didn’t conceal the less-than-optimal decoration, but I earned a lot points for imaginative and rhetoric culinary speech.
But, it all comes down to taste. And it tasted good. Very good, in fact: a very rich taste (not totally cocoa, but also not totally vanilla), with a moist and sensuous texture. A pleasure as sinful and guilty as only cake can be.
Ingredients
Cake
- 2 cups shortening (=226g; I replaced it with butter)
- 3 cups of sugar (=600g)
- 4 eggs
- 4 ounces of red food coloring (I used 20ml in total)
- 1 tablespoon of cocoa
- 2 teaspoon salt
- 5 cups flour (=640g)
- 2 cups butter milk (=500ml)
- 2 teaspoon baking soda
- the seeds of 2 vanilla pods
- 2 tablespoons vinegar (I used white balsamic, for no reason in particular. I just happened to have it on my cupboard).
Butter cream (frosting)
- 10 table spoons flour (I used Maizena, as I like its flavor and consistency better than regular flour)
- 2 cups milk (=500 ml)
- 2 cups unsalted butter (=226g)
- 2 cups sugar (=400g)
- the seeds of 2 vanilla pods
Method
Cake
Preheat oven to 180oC. Butter and line 3 9″ baking pans with parchment paper (I used 3 squared trays)Place melted butter and sugar in bowl and beat until light and fluffy (about 10 minutes). Add eggs one at a time, beating after each addition.
Make a paste of the food colouring, cocoa and salt (I never got a paste, as 20ml were not enough to bind with the cocoa). Add to butter mixture.Mix vanilla with buttermilk. Dissolve baking soda in vinegar, add to butter milk (it gets a bit fizzy – you might want to consider to use a larger bowl).
Sift and measure flour; add to creamed shortening alternating with buttermilk mixture ending with flour. Mix until smooth approx. 4-5 minutes.Pour into pans. Bake 35-40 minutes. Remove from oven, cool 10 minutes, then invert cakes onto cooling rack and to cool completely before frosting.
Frosting
Make a paste with flour and a small amount of the milk. Add remaining milk gradually, mixing until smooth. Cook in a double boiler at medium heat until thick (do not forget to stir while cooking to avoid burning. If it gets to hot, remove it from the heat and stir to cool it a bid. It should be a very slow simmer. At the end, it will be a very thick mixture at end, but if you can see lumps it is pass it through a fine sieve). Let cool.
Cream butter with icing sugar and vanilla. Beat until fluffy. Add cooled flour mixture 1 spoon at a time, beating well between additions.
Coconut and zucchini bread
Posted: August 8, 2011 Filed under: Dessert, Vegetarian | Tags: Cake, Coconut, Courgette, Food blogger recipe, Sugar, Zucchini 4 Comments
I saw it on Canela Moída, whom had seen it on The Novice Housewife, whom had seen it on Thru The Bugs On My Windshield, whom had seen it on Meet the Swans whom had seen it on Cooking Light Comfort Food Cookbook. Somewhere along the way, the bananas in the original recipe were replaced by an equivalent amount of zucchini (= courgette=calabacin). The combination of flavors sounds a bit iffy – Zucchini? in a cake?? with coconut??? But, have not prejudices: the result is scrumptious. Not only it passed the 11-year old test, but also the 8-month eat it all with gusto and impatience. If he only knew those green dots belongs the same family than the green soups he spits all over himself…
Some bloggers made a Coconut Rum Lime glaze to put on top of it. I am not a big fan of sugary things and excessive ornamentation of cakes, and skipped it. Keeping on sugar matters, this cake is not at all sweet. If you have a sweet tooth, you might want to add more sugar than the quantity I used. Or replace the zucchini by an equivalent amount of bananas.
Coconut Zucchini Bread
Ingredients
- 1/4 cup butter (about 60g)
- 1 cup sugar (about 200g. You might want to increase the amount, if you like yours more sweet)
- 2 whole eggs
- 1 1/2 cups ripe zucchini, grated (about 1 medium size
2zucchinis,app 120g) - 1/3 cup plain yogurt (I used a whole small pack, with about 180g, minus 1 table spoon))
- 1 teaspoon rum (I used Malibu – maybe a little more than a 1 teaspoon)
- The seeds of a vanilla pod (or 1 teaspoon of vanilla extract)
- 2/3 cup grated coconut (about 100g)
- 3/4 teaspoon baking soda
- 1/2 tsp salt
- 2 cups flour (about 250g)
Methods
Pre heat the oven to 180 oC . Grease a loaf pan with butter and powder it with flour.
Cream butter and sugar until the mixture is white and fluffy. Then beat in the eggs, one at a time, mixing well.
Add the zucchini, the yogurt, the vanilla seeds and the rum. Beat until well blended.
Fold in the coconut and all the dry ingredients, and mix until just blended (do not over stir).
Spoon the batter into the loaf pan previously buttered.
Bake for about an hour, or until toothpick comes out clean from the middle of the bread.
Cool in the pan for about 10 minutes and then transfer to serving plate.
Coconut Rum Lime Glaze
Ingredients
- 3 cups sugar
- The seeds of a vanilla pod (or 1 teaspoon of vanilla extract)
- 1 teaspoon of rum or rum extract
- 3 teaspoon of freshly squeezed lime juice
- Milk as required to get the glaze to the right consistency (you can use coconut milk, in case you have that in hand)
- Roasted coconut to taste
Method
Mix all ingredients except the milk in a medium bowl. Add milk until it becomes a thick but smooth glaze. Set aside.
Toast coconut under the broiler until just browned. Set aside.
Drizzle glaze over bread. Top with toasted coconut and lime zest.
Rice Pudding with Orange Jewels, Tarragon and Puffed Rice
Posted: July 17, 2011 Filed under: Dessert, Grains, Jams and confits, Rice | Tags: Dessert, Gary Mehigan, George Calombaris, Masterchef Australia, Milk, Orange, Rice, Sugar 2 Comments
I cannot make rice pudding the way my Mother does. No matter how many times I have watched her doing it or how scrupulously I follow her instructions, it is not the same thing. It doesn’t taste the same, it doesn’t feel the same and it doesn’t do her recipe any justice. It seems just impossible to reproduce her pudding rice. For a while, I tried other recipes, like the one Spanish chef Juan Maria Arzak has in one of his books, to less than optimal results.
A few days ago, while watching season 2 of Masterchef Australia, I saw how Gary Mehigan and George Calombaris did this rice pudding during one of their masterclasses. It looked delicious, packed with different flavors and textures, and they comprehensively explained how to cook it. And, I decided it to give a another go to rice pudding. Anyway, what sort of expectations would you have on an Australian rice pudding recipe? It was worthwhile the effort. In fact, there was a respectful silence around the table while people eat their desserts… Do not feel tempted to remove the tarragon, on the pretenses that no rice pudding has green stuff on it. With the orange, it is a delicious combination.
Rice Pudding with Orange Jewels, Tarragon and Puffed Rice
Ingredients
Rice pudding
- 40g caster sugar (or sugar too taste )
- 700ml milk (the real thing, with all its fat)
- 135g Arborio rice, rinsed and drained
- 1 vanilla bean, split, seeds scraped
Candied orange peel
- 1 cup of sugar
- 1 cup of water
- the peel of 1 orange, pith removed, julienned in the vertical
- 1 orange, peeled zest, pith removed, julienned
To serve
- tarragon leaves,
- 1/4 cup puffed rice, toasted
- 1 orange flesh segmented
Orange jewels
- 15g caster sugar
- 1 ½ tsp agar agar powder (do not follow the instructions on the bottle, as they are aimed to get a gelatin consistency. The jewels need to be solid to be cut properly, so it is OK if you add agar agar in excess).
- 190ml freshly squeezed orange juice, strained (I used the juice of 2 oranges and topped with water until I had 250mL of liquid)
Method
Step 1: For the candied orange peel, place 1 cup of the sugar and 1 cup of water in a small saucepan over low heat, stirring until the sugar has dissolved. Increase the heat to medium, add orange peel and simmer gently for 45 minutes until syrupy. If you are not using it immediately, it is better to separate the peels and letter then cool).
Step 2: For the orange jelly, line a 500ml plastic container with cling film. Add ¼ cup water, orange juice and sugar to a small saucepan and bring to the boil. Sprinkle in agar agar and whisk for about 5 minutes until dissolved. Remove from the heat. Pour the mixture through a fine sieve into the lined container. Refrigerate for about 25 minutes or until set. Invert jelly from container onto a board and cut into 1cm cubes.
Step 3: For the rice pudding, add the milk, rice, vanilla bean and seeds to a non-stick saucepan. Bring to the boil and simmer uncovered for 30-35 minutes, or until creamy and the rice is tender, stirring regularly. Add the remaining sugar and stir for about 2 minutes until dissolved (I had to use the whole 1-L of milk, as the rice absorbed the first 700mL of milk).
Step 4: To serve, divide rice pudding between serving bowls. Arrange the jelly jewels on top, along with the orange segments, tarragon leaves, candied orange peel, a spoonful of syrup and some puffed rice. Serve immediately.
Chocolat Carré
Posted: March 28, 2011 Filed under: Chocolate, Dessert | Tags: Chocolate, Sugar Leave a comment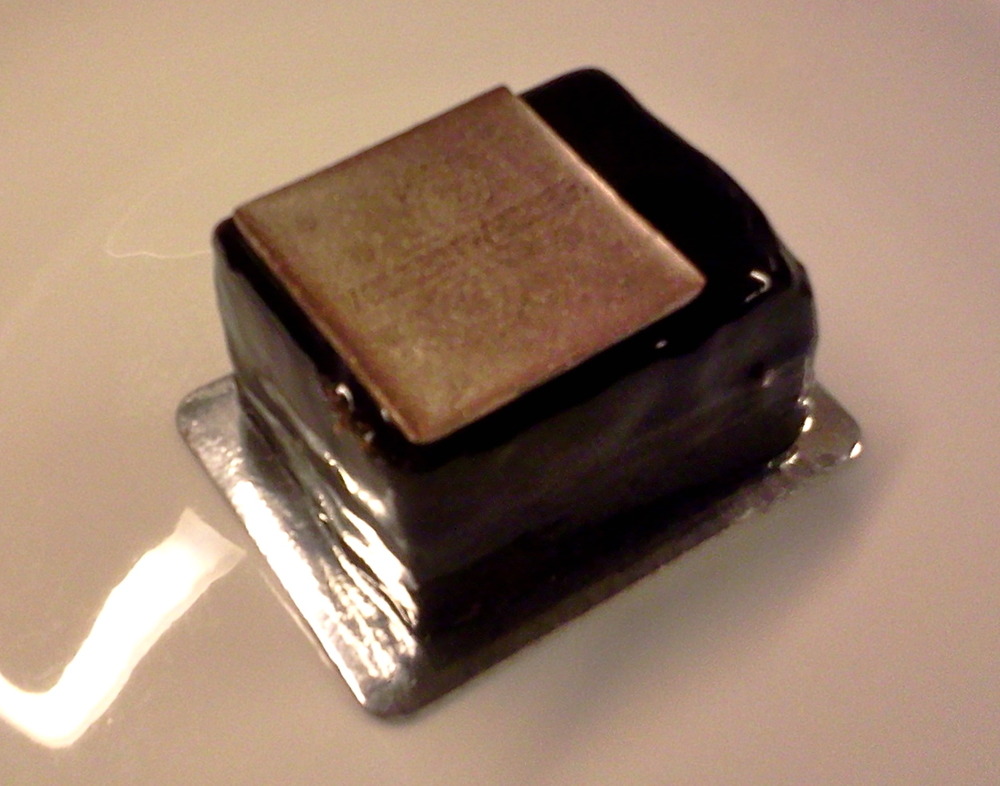
A mousse au chocolat variation by Vollenweider Chocolatier. Absolutely decadent.
